
While it has been a very long time since I've posted, I couldn't help sharing one of my favorite things about the holidays - wrapping presents.
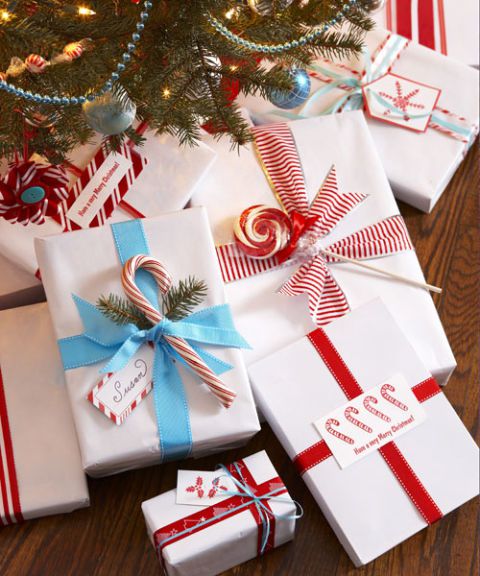
The inspiration taken from this wonderful photo, was primarily the look of gifts wrapped all in the same color, with one or two contrasting same colors for the focal points.
Instead of ribbons to tie the look together, I used die cuts (my favorite paper item). The nice large "canvas" allows for some more oversized compositions. The graphical nature of their sophisticated silhouettes makes for a bold , yet understated, visual impact.

Below are the images of the individual packages. You'll notice MANY Papertrey dies used, as well as supporting bits from Impression Obsession, My Favorite Things, Elizabeth, Impression Obsession, Memory Box, Poppy Stamps, and Marianne. Here goes!


Yes, I've been saving these from last year to share, and I'm not that far ahead of this year's gift giving. I sure hope you enjoyed these, and will give this look a try.


